Table of Contents
Create Device Group on MikroWizard #
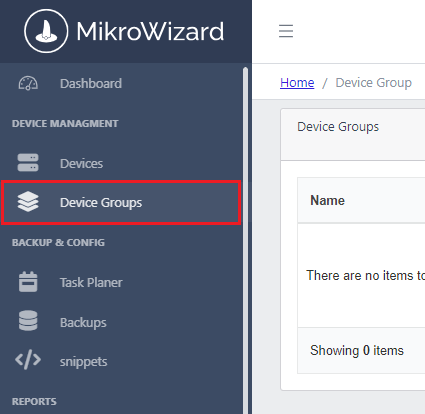
- Select the “Device Groups” option from the main menu on the left side.

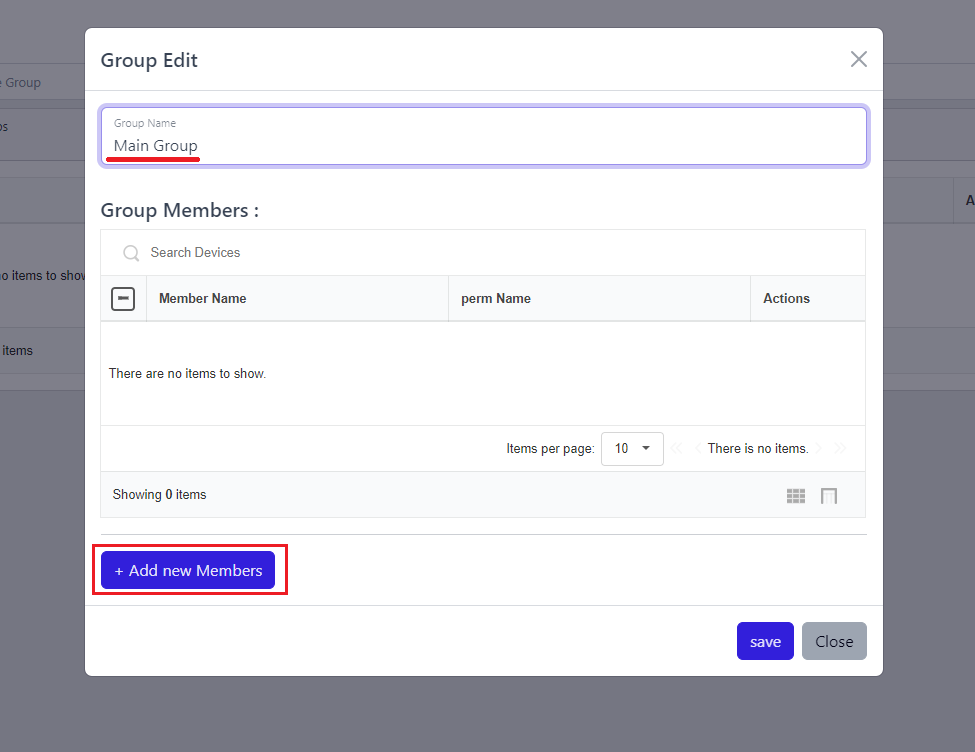
2. Click the “+” button to enter the “Group Edit” page.

3. In the Group Edit page, enter the name of the new group and to add a new device, click the “Add New Member” button.

Naming Conventions: Use clear and descriptive names for your device groups to facilitate easier navigation and management.
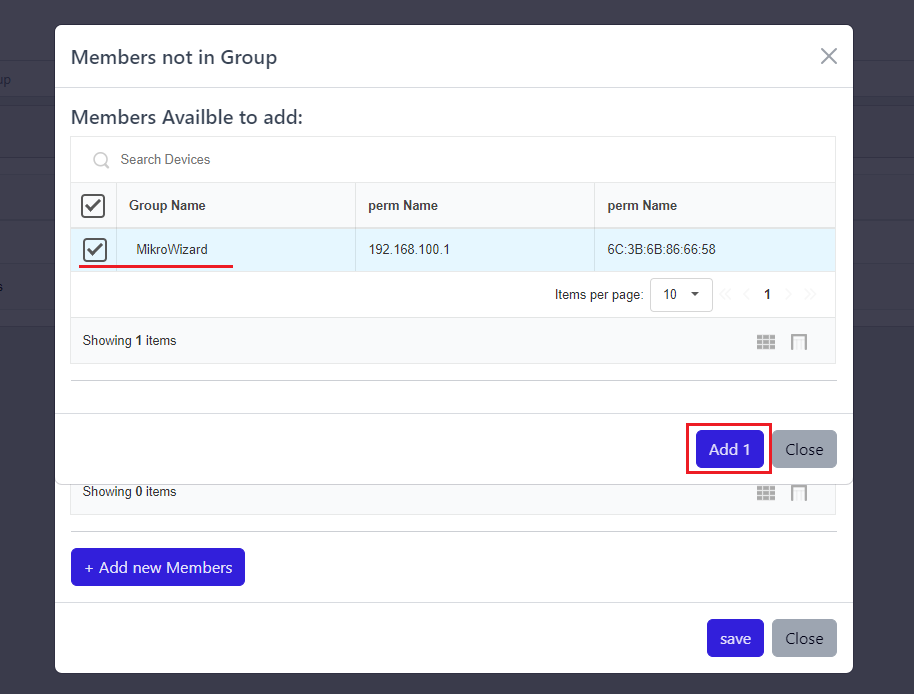
4. In the pop-up window, a list of all available devices will be displayed.
- Select the desired device(s) from the list and click the “Add” button to include it in the group.

- Finally, click the “Save” button to create the new group along with its associated devices.
Managing Device Groups #
- After creating the group, you can manage it on the “Device Group” page.
- Use the options available in the “Action” section for each group to:
- Delete the group if it is no longer needed.
- Edit the group to change its name or modify its members.
- Display devices within each group for easy management and monitoring.
- Use the options available in the “Action” section for each group to:

Device Organization: Group devices based on their type, function, or location to enhance your network management efficiency.
Regular Updates: Periodically review and update your device groups to ensure they accurately reflect your current network architecture.
Access Permissions: Ensure appropriate access permissions are set for users who will manage or view device groups to maintain network security.
Regular Updates: Periodically review and update your device groups to ensure they accurately reflect your current network architecture.
Access Permissions: Ensure appropriate access permissions are set for users who will manage or view device groups to maintain network security.


