
 MikroWizard
- 1. Overview & Architecture Prerequisites
- Step 1: Add or Verify Your Device in Inventory
- Step 2: Install & Verify Terminal Gateway Addon
- Step 3: Create Your First Terminal Security Policy
- Step 4: Grant PAM / Terminal Access in User Management
- Step 5: Assign the Policy to Preferred Device Group
- Step 6: Connect to Device Terminal via Connection Manager
- Summary & Troubleshooting
MikroWizard PAM Web TTY & Terminal Gateway: End-to-End Setup & Operations Guide
1. Overview & Architecture Prerequisites #
The MikroWizard Terminal Gateway delivers zero-client, browser-based Privileged Access Management (PAM) Web TTY access to network infrastructure. Sessions run through high-performance xterm.js terminals over encrypted WebSockets (Ports 8200 and 8201), eliminating the need for local desktop SSH clients (like PuTTY or SecureCRT) and avoiding public SSH port exposure.
- Zero Port Exposure: Terminal Gateway multiplexes connections behind reverse proxies—no open SSH ports needed on WAN.
- Pre-Execution Guardrails: Inspects and blocks unauthorized CLI commands before they hit routers.
- Immutable Audit Logging: Automatically records sessions into Asciinema v2 (
.cast) format for compliance and review. - Multi-User Live Collaboration: Allows sharing sessions in real-time with granular Owner, Collaborator, and Observer roles.
Step 1: Add or Verify Your Device in Inventory #
First, verify that your target device is registered in MikroWizard.
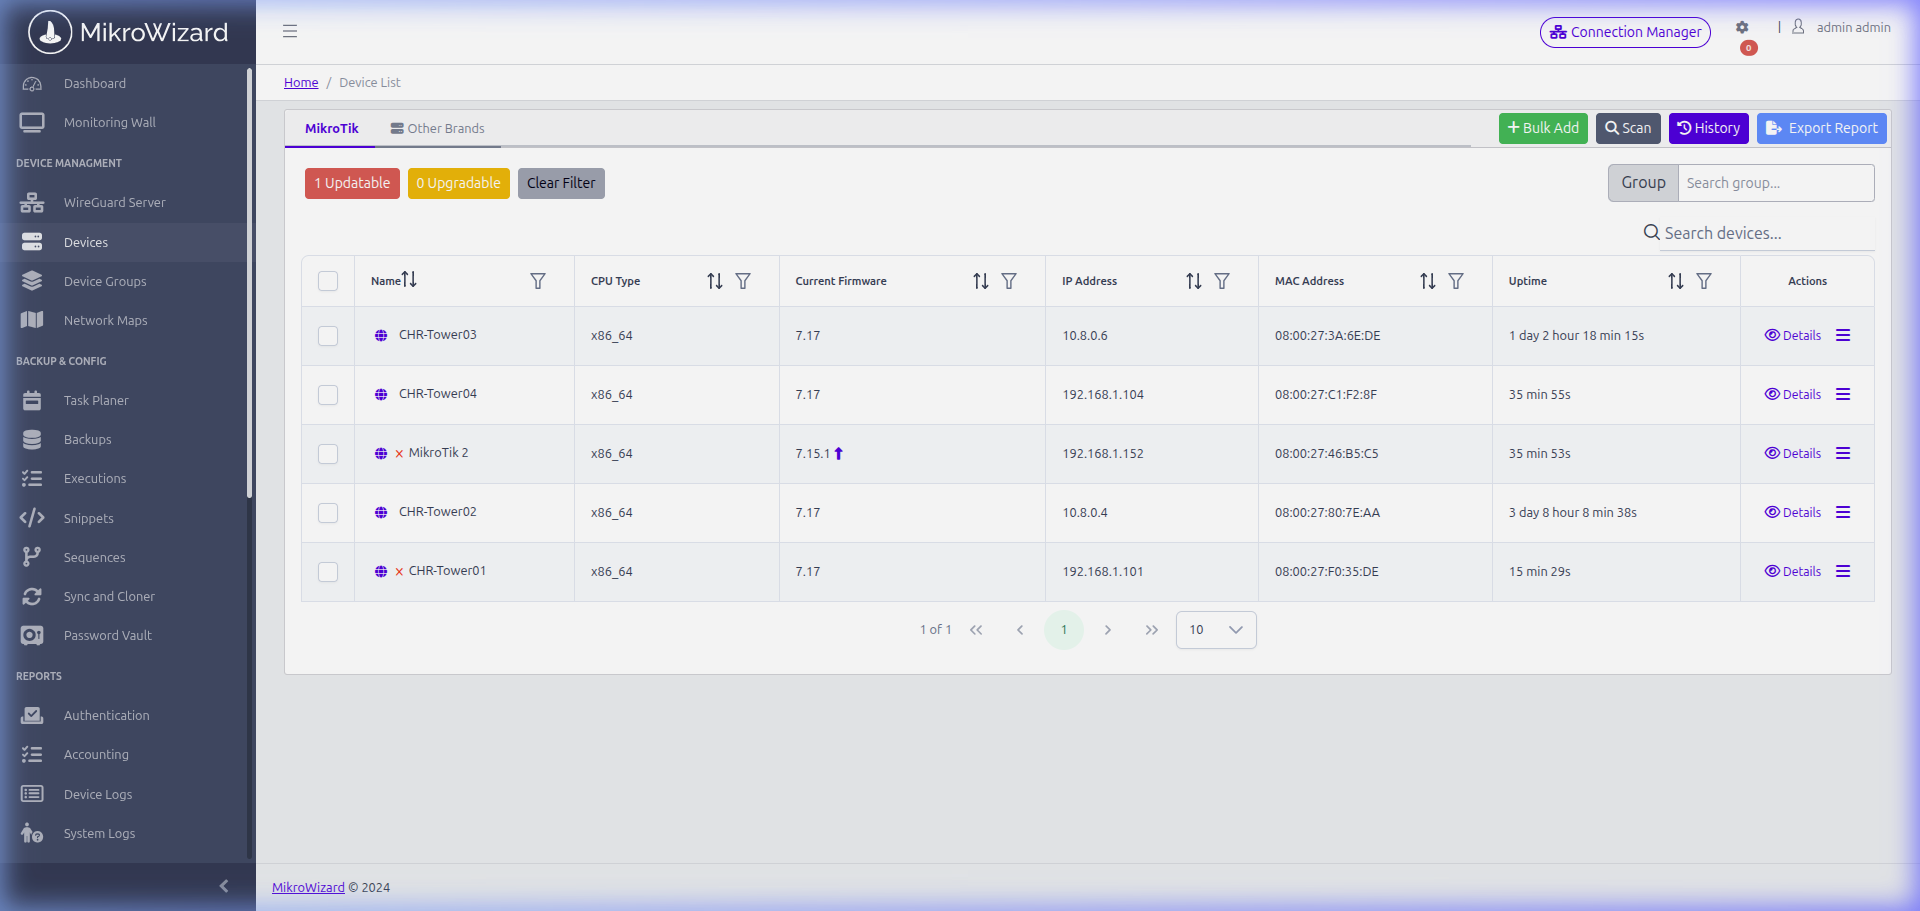
In our demonstration environment, the primary router CHR-Tower01 (MikroTik Cloud Hosted Router running RouterOS 7.17) is already configured and ready.
- In the left sidebar menu, click Devices (
/#/devices). - Locate
The devicein the inventory table to verify its IP address (here is192.168.1.101), group assignment (Default), and active connectivity status. - To add a new MikroTik or Generic Linux device: Click the blue + Bulk Add or Add Device button in the top-right toolbar(switch between mikrotik and non mikrotik tabs), enter device credentials, IP/port, and protocol settings, then click Save.
Step 2: Install & Verify Terminal Gateway Addon #
To use PAM Web TTY features, verify that your MikroWizard license has active PAM Seats. an make sure you installed the pam terminal gatway addon.
Run the automated 1-line installer in your server terminal:
Step 3: Create Your First Terminal Security Policy #
Security policies act as zero-trust guardrails that inspect commands in real time. Follow these steps to build your first policy:
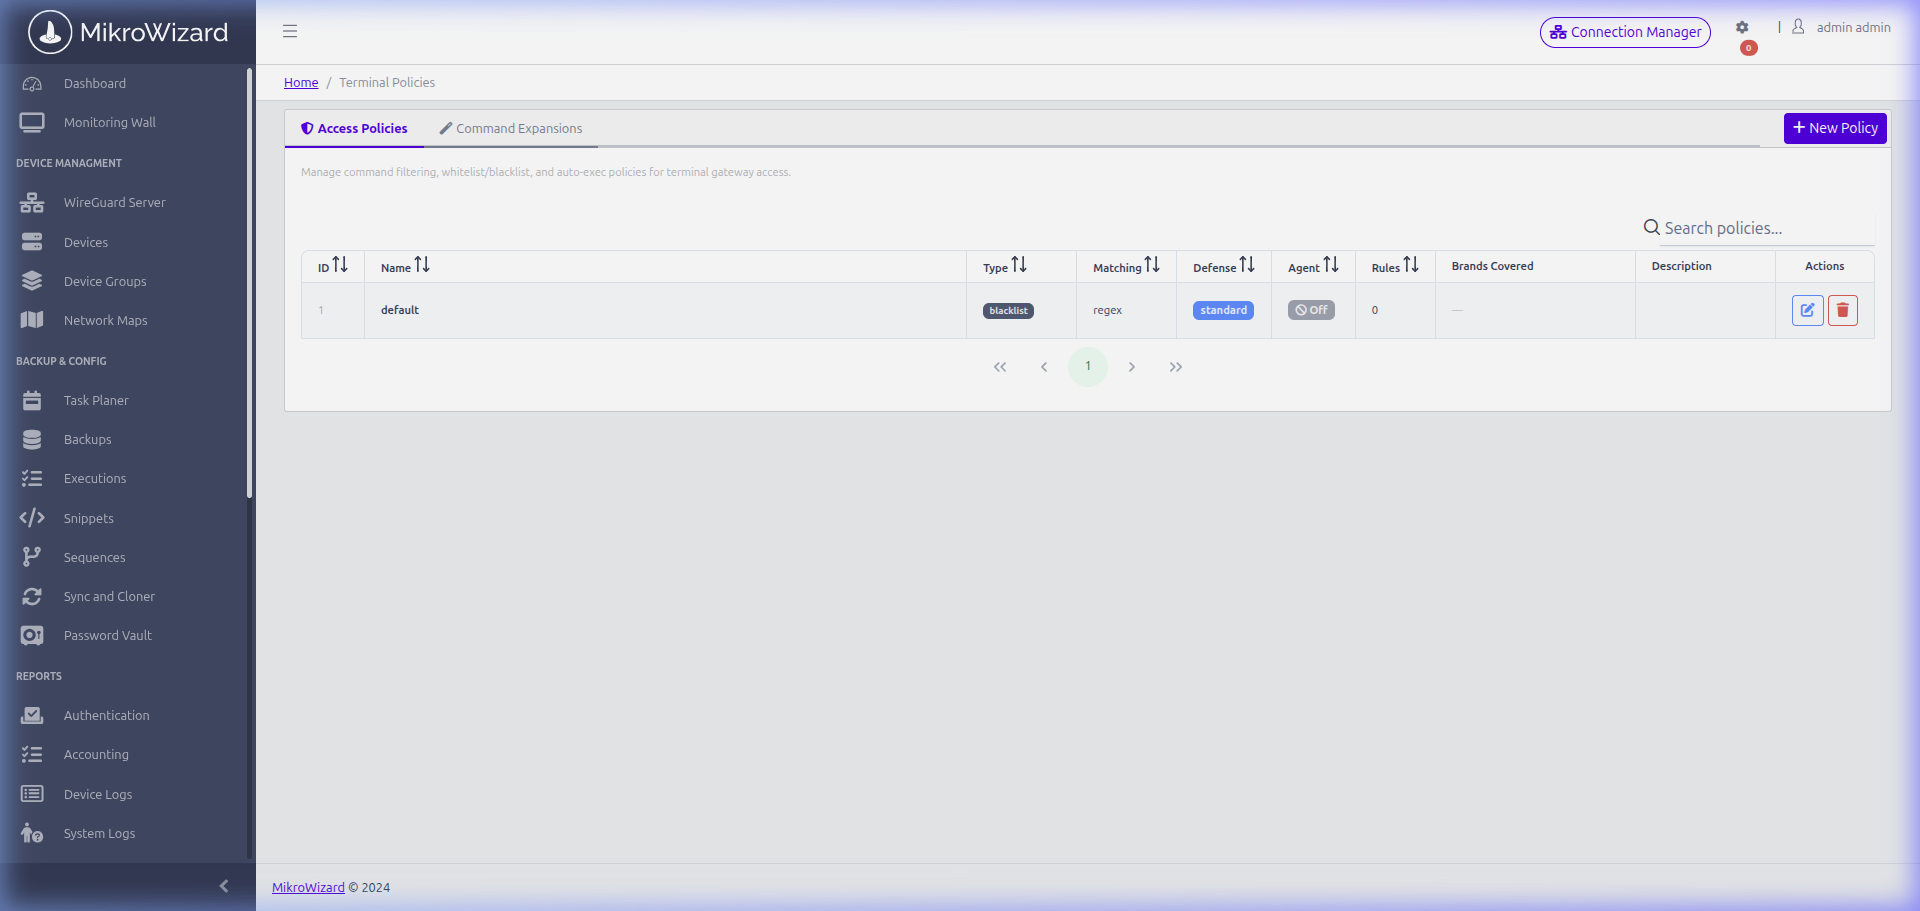
- In the left sidebar menu, click Security & Policies (
/#/policies). - Review existing policies in the table. Click the blue + New Policy button located at the top-right of the table.
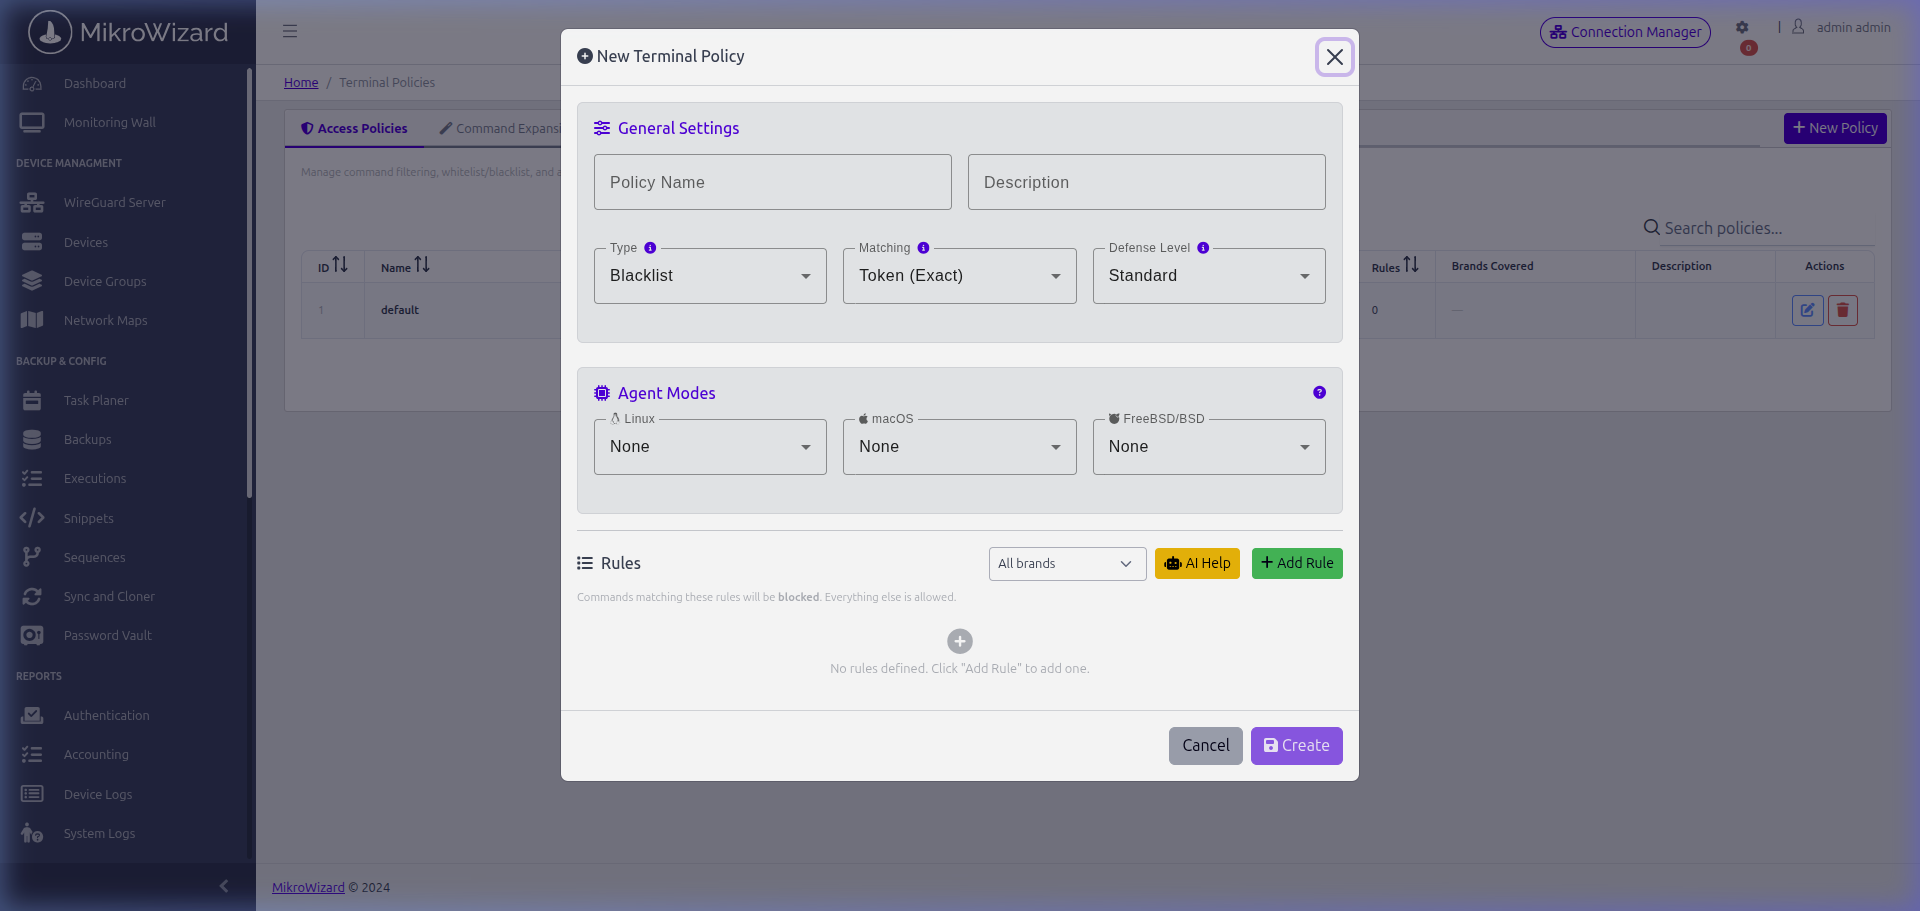
- In the New Security Policy modal, fill in the configuration fields:
- Policy Name: e.g.
Default NOC Guardrails. - Description: e.g.
Blocks destructive commands and prevents accidental device resets. - Policy Type: Select
Command Guardrail. - Defense Level: Select
Level 1 (Token/Regex),Level 2 (Shell Hook), orLevel 3 (Kernel ptrace/seccomp). - Action Behavior: Select default action (
Block,Warn,Log,Terminate, orRequire Approval). - Command Rules (Regex): Define rules such as
/system reset-configuration.*,/system reboot.*,export hide-sensitive=no.*, andrm -rf /.*.
- Policy Name: e.g.
- Click the blue Save Policy button to register the policy.
| Rule Matcher (Regex) | Action | Target Scope | Description |
|---|---|---|---|
/system reset-configuration.* | Block | MikroTik RouterOS | Stops factory resets and prevents configuration loss. |
/system reboot.* | Warn | MikroTik RouterOS | Requires operator confirmation before rebooting production nodes. |
export hide-sensitive=no.* | Block | MikroTik RouterOS | Prevents unmasked credential dumping in terminal. |
rm -rf /.* | Terminate | Linux Hosts | Terminates destructive recursive deletion commands instantly. |
Step 4: Grant PAM / Terminal Access in User Management #
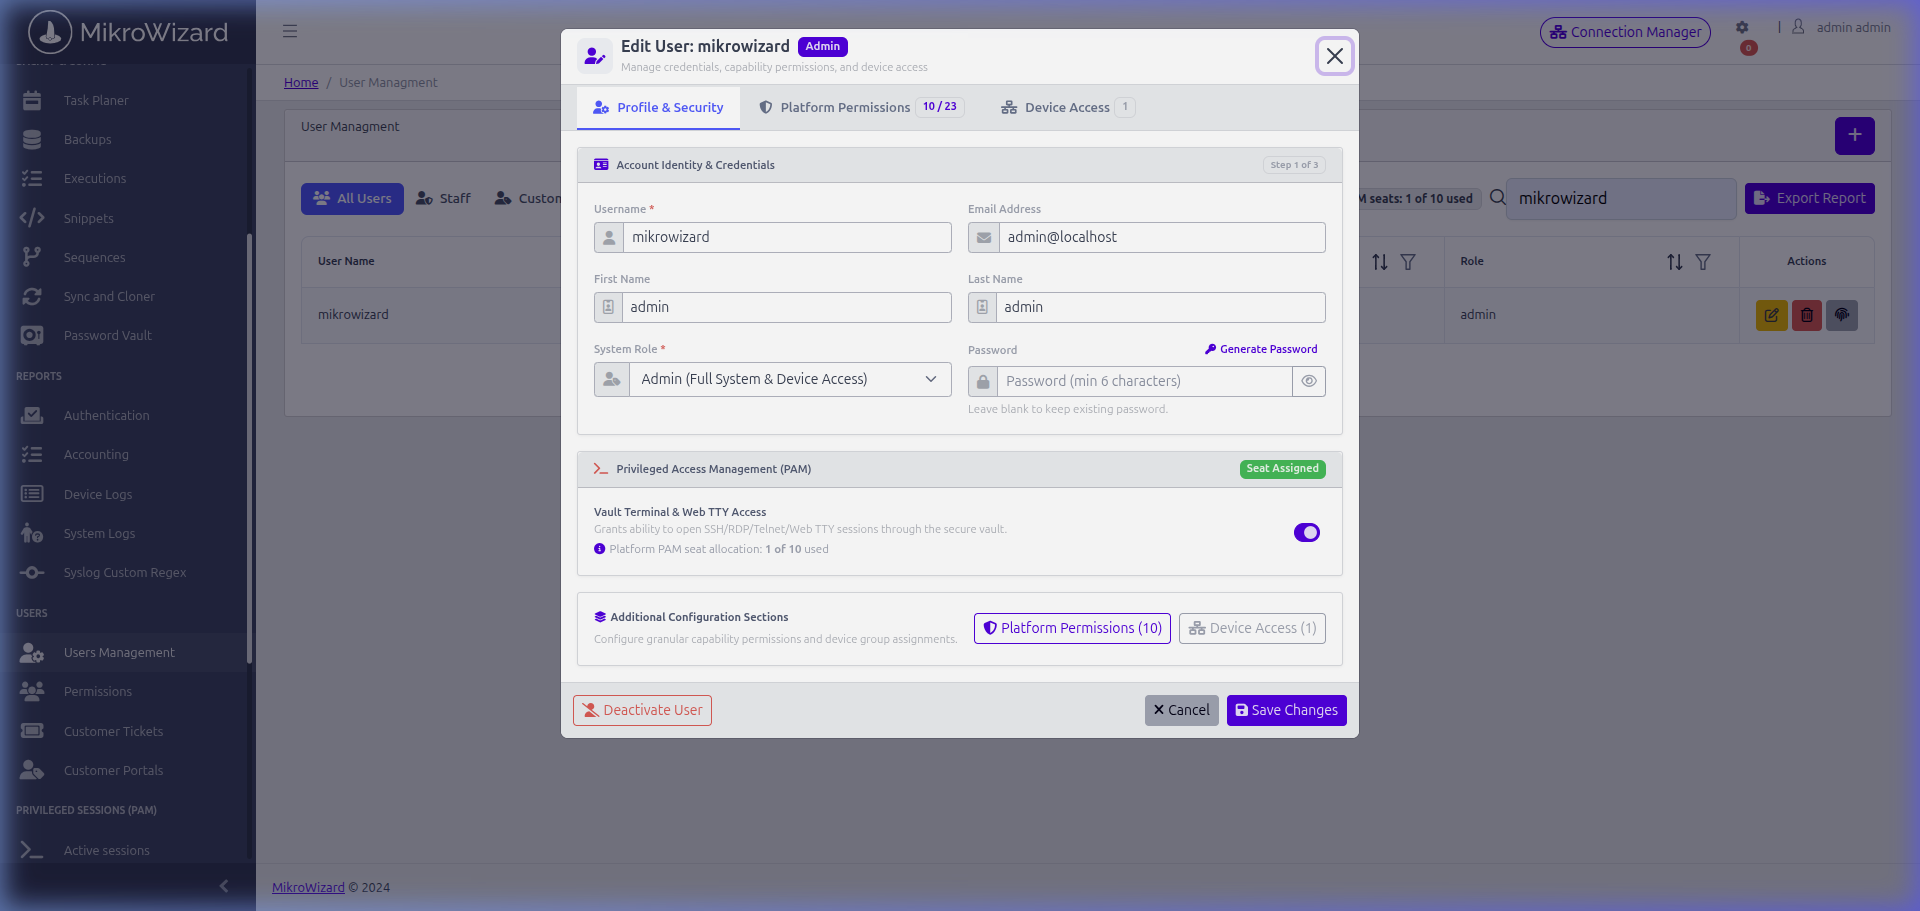
By default, operator accounts cannot open live Web TTY sessions unless explicitly granted privilege:
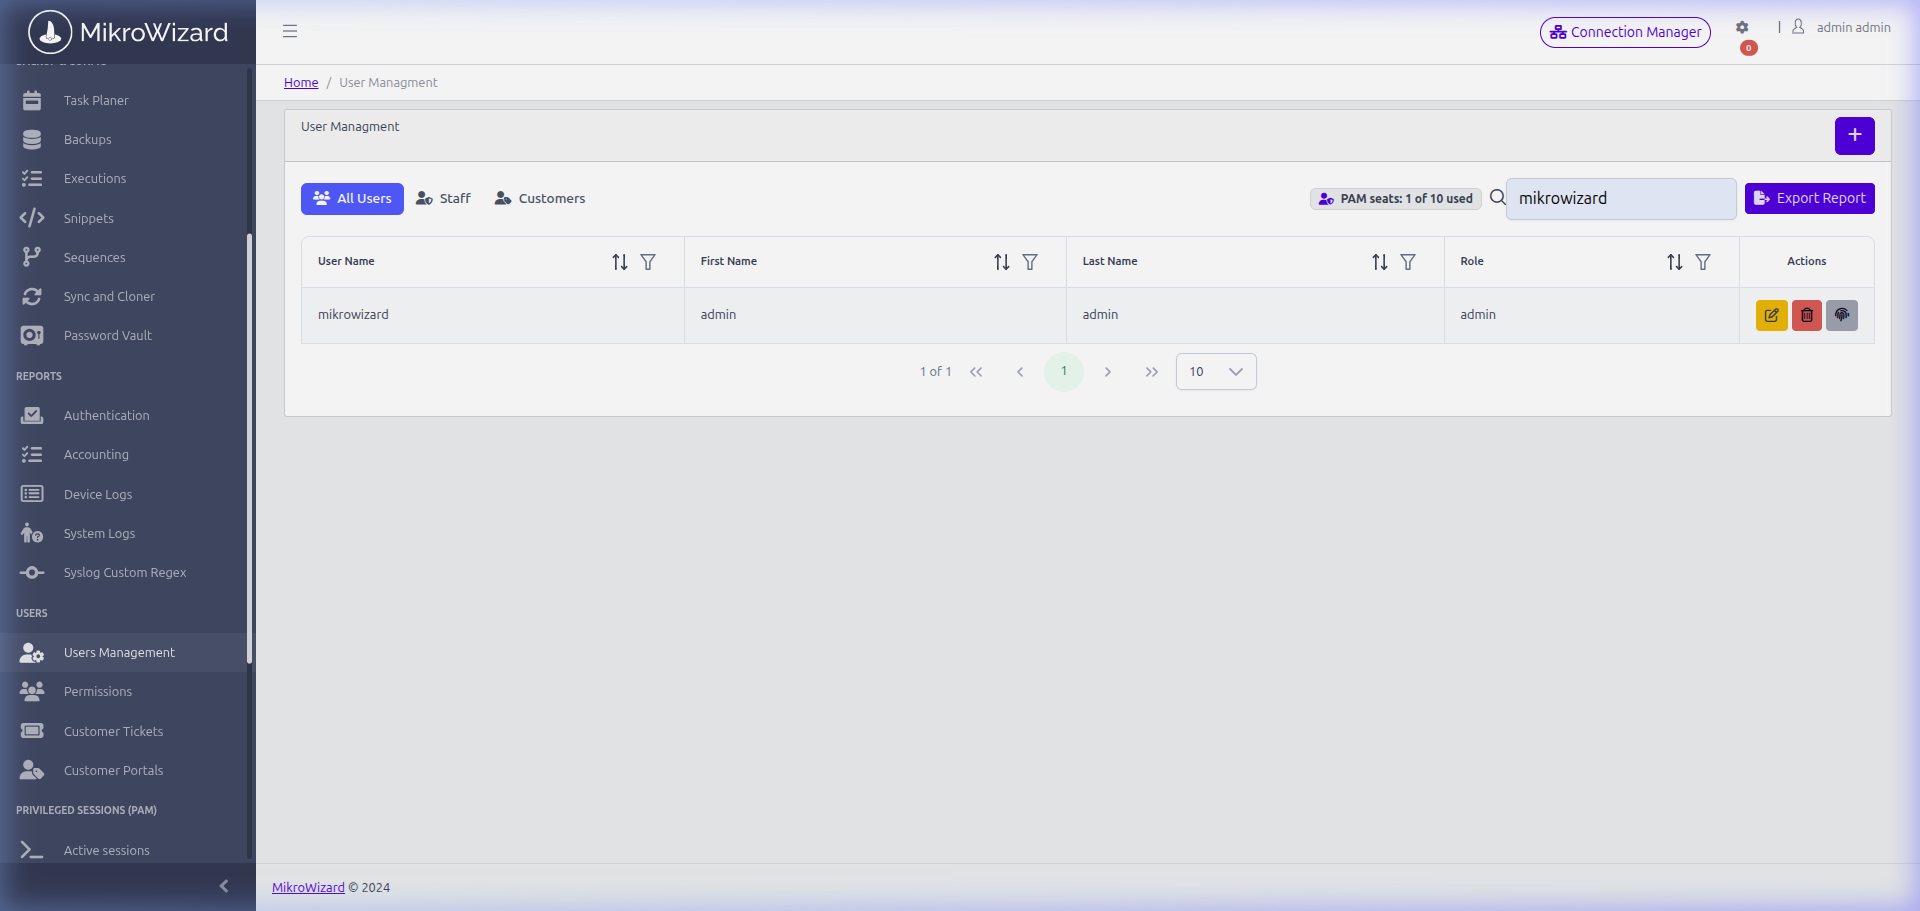
- In the left sidebar menu, click Users (
/#/users). - Locate the target operator or engineer row (e.g.
engineer) in the user list. - Click the Edit button (pencil icon) on the right side of the row.
- In the Edit User Account modal dialogue, scroll down to the Permissions section.
- Locate and toggle ON the PAM / Terminal Access switch (
p_connection_manager). - Click the blue Save Changes button to apply the updated privilege profile.
Step 5: Assign the Policy to Preferred Device Group #
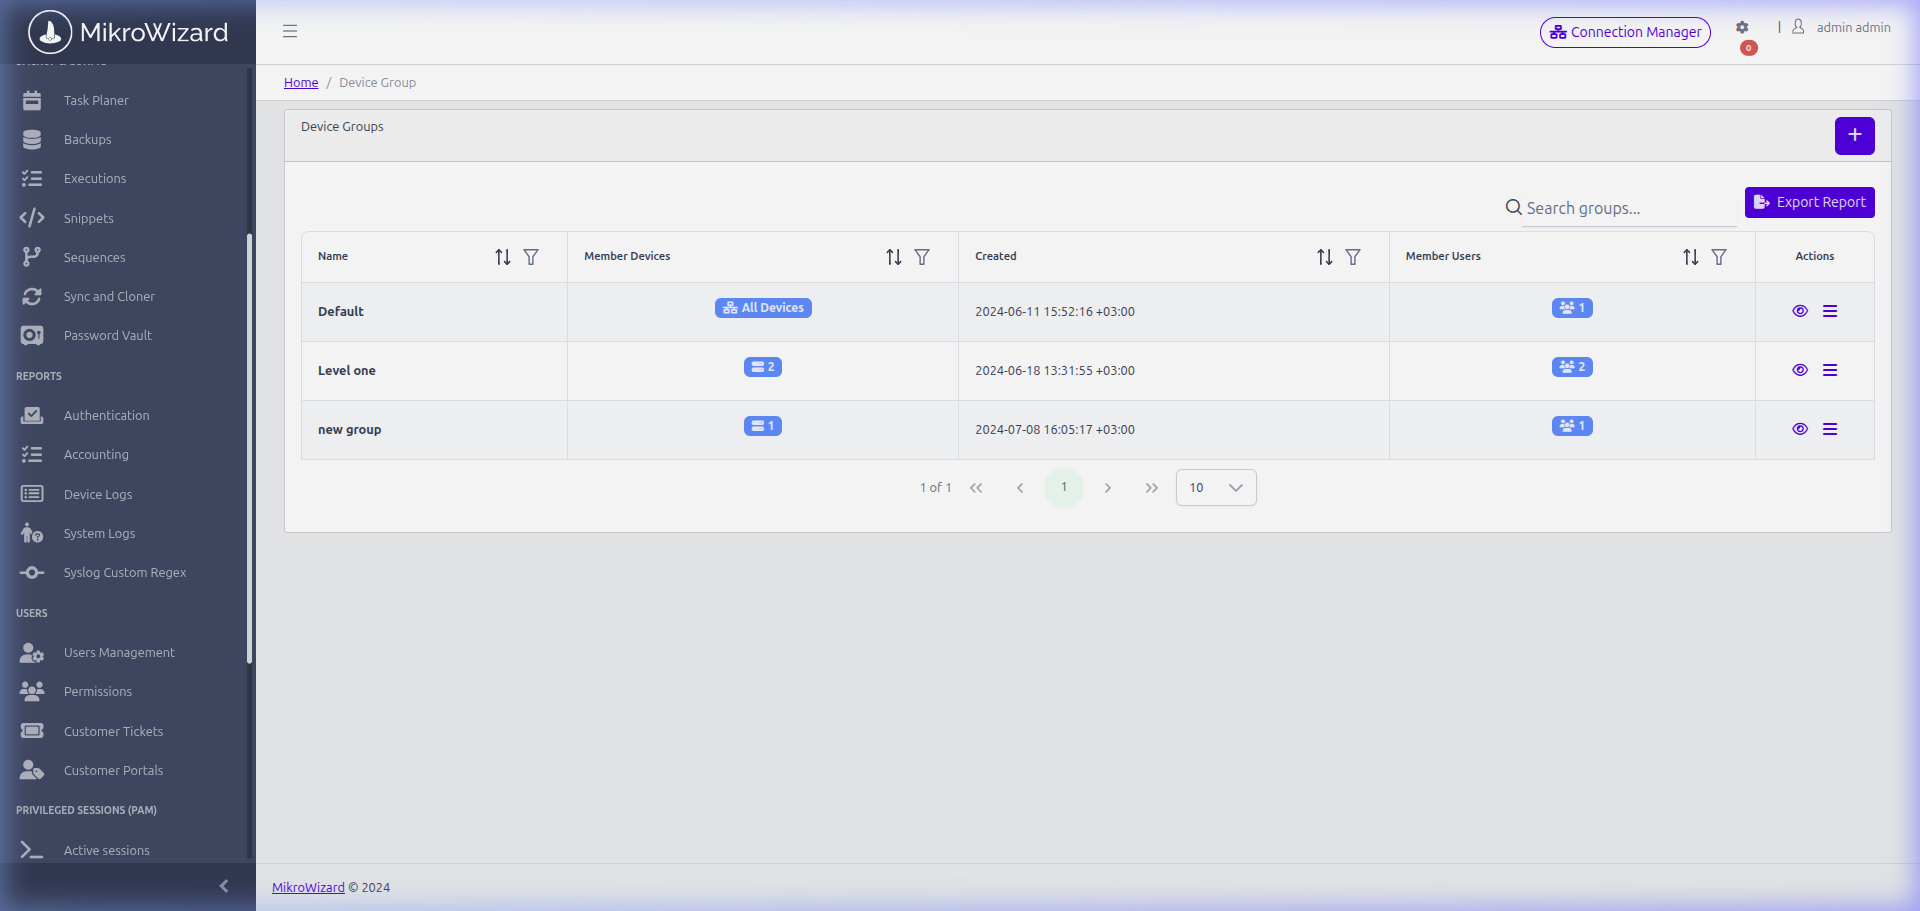
To enforce your security policy across devices, assign it to the target Device Group in the user permissions matrix:
- In the sidebar menu, click Device Groups (or navigate to Manage Users → Device Groups tab).
- Locate the group containing
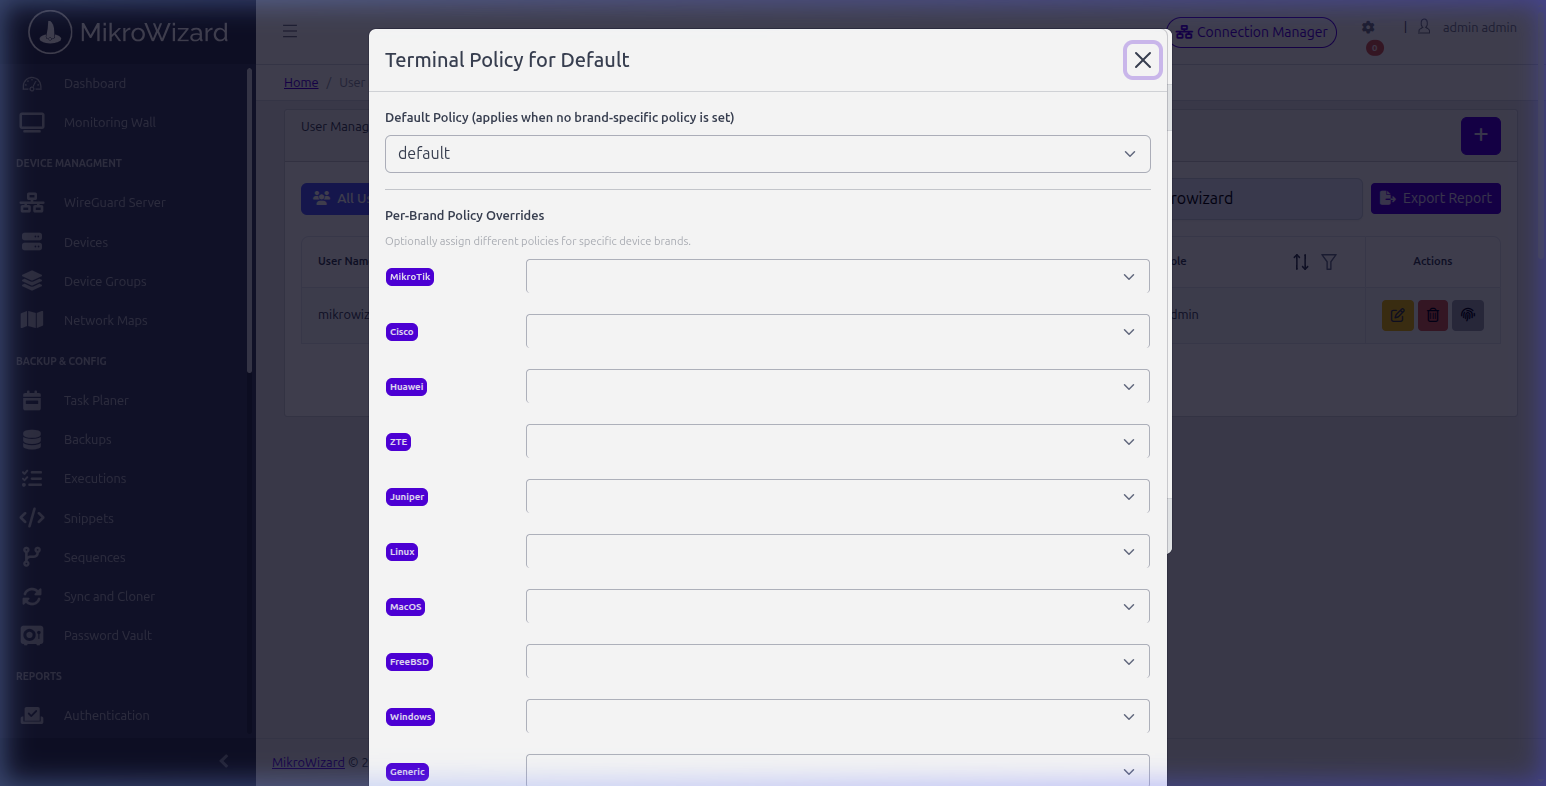
CHR-Tower01(e.g., theDefaultorCore Routersgroup). - In the Terminal Policy column, click the Edit button (pencil icon).
- In the Policy Assignment modal/dropdown, select your newly created policy (
Default NOC Guardrails). - Click the Update button to bind the policy to all devices in the group.
Step 6: Connect to Device Terminal via Connection Manager #
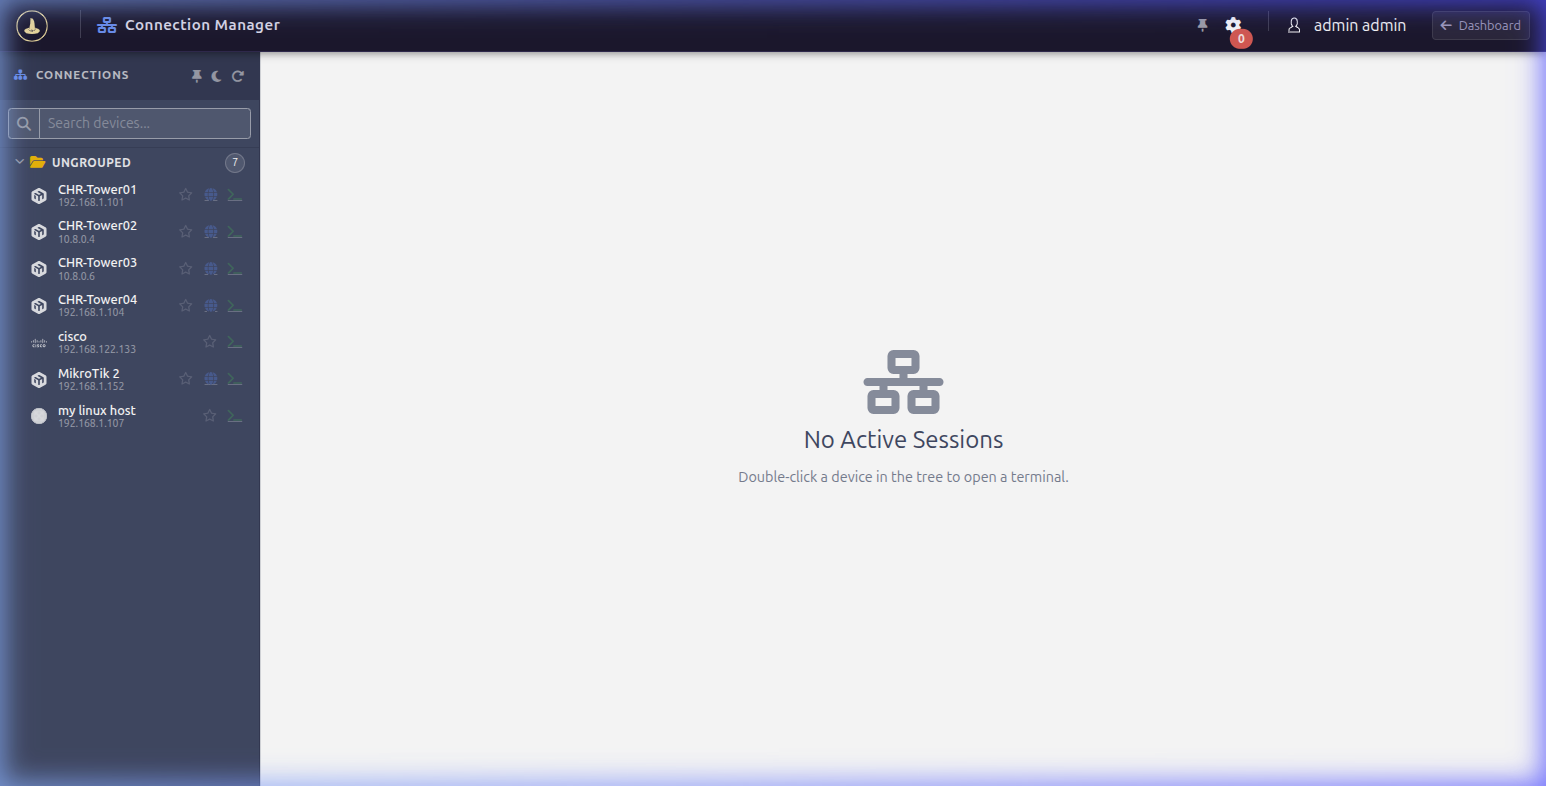
Now that permissions and policies are bound, launch your in-browser Web TTY session:
- In the left sidebar menu, click Connection Manager (
/#/connection-manager). - Locate
CHR-Tower01in the active device table. - Click the black Terminal Button () on the
CHR-Tower01row. - The browser instantly establishes an authenticated WebSocket session to the Terminal Gateway, rendering the full-color
xterm.jsinterface, RouterOS banner, and interactive prompt ([admin@CHR-Tower01] >).
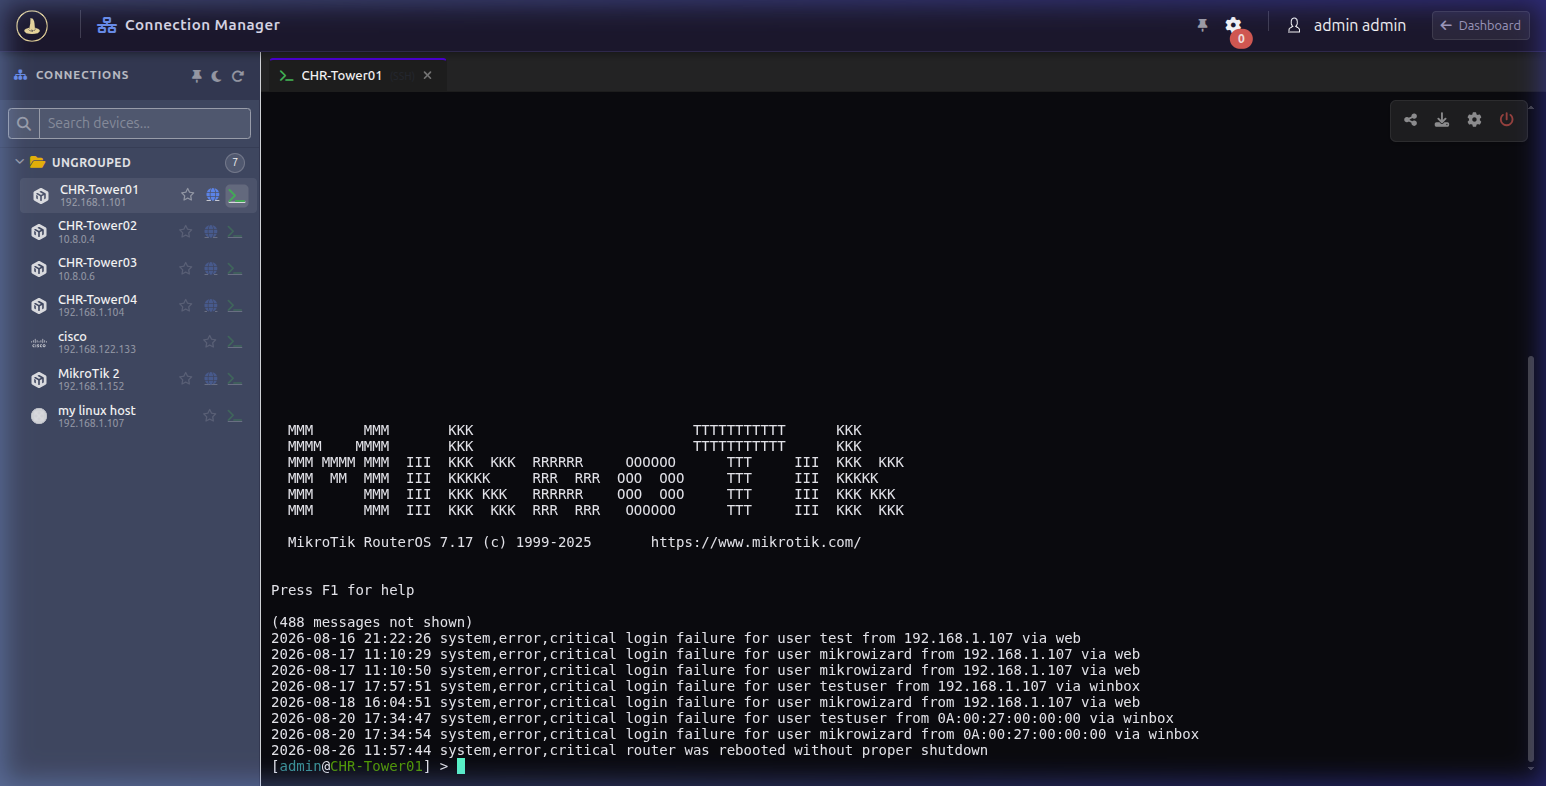
Live Session Capabilities & Features: #
- Instant Guardrail Blocking: Type a restricted command (e.g.
/system reset-configuration) to verify that the policy engine halts execution and displays an access violation warning. - Live Multi-User Collaboration: Click the Share Session button in the terminal header to invite colleagues with role enforcement (Owner, Collaborator, or Observer).
- Asciinema (.cast) Session Playback: All keystrokes, outputs, and window resizes are automatically preserved on disk and can be replayed in PAM → Session History.
Summary & Troubleshooting #
| Issue / Symptom | Probable Cause | Resolution |
|---|---|---|
| Terminal button disabled or missing | User account lacks PAM / Terminal Access privilege | In Users (/#/users), edit the user and toggle ON PAM / Terminal Access. |
| WebSocket connection failed (502 / 404) | Terminal Gateway service is stopped or token mismatched | Check container status with docker ps | grep terminal-gateway and verify token in server-conf.json. |
| Policy not blocking commands | Policy not assigned to the device’s group | Navigate to Device Groups, edit the Terminal Policy column, and select the active policy. |
You are now fully configured to use MikroWizard Terminal Gateway and PAM Web TTY. For advanced workflows, explore automated credential vault rotation, multi-tenant RBAC, and WebFig reverse proxying.


